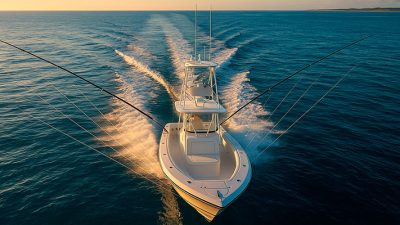
Wiring your boat trailer lights properly is not only a legal requirement but also a critical safety measure. Whether you’re hauling a small fishing skiff or a large offshore vessel, working trailer lights ensure that other drivers see your signals and brake lights clearly — especially during low visibility or at night. This guide will walk you through how to wire boat trailer lights step-by-step using marine-grade wiring, connectors, and components designed to resist corrosion and handle tough environments.
What You’ll Need Before You Begin
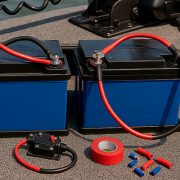
- Marine trailer light kit (includes LED or incandescent tail lights, side marker lights, and wiring harness)
- 4-pin or 5-pin trailer wiring connector
- Marine-grade trailer wiring (usually color-coded)
- Heat-shrink butt connectors or waterproof wire connectors
- Crimping tool and wire stripper
- Drill with bits (optional for mounting lights)
- Zip ties or cable clamps
- Dielectric grease (to prevent corrosion in connectors)
Understanding Boat Trailer Wiring Color Codes
Boat trailer wiring typically follows the standard 4-wire flat connector system:
- Brown: Tail/running lights (both sides)
- Yellow: Left turn signal and brake light
- Green: Right turn signal and brake light
- White: Ground wire (connected to trailer frame)
Some boat trailers use a 5-wire flat connector to include a blue wire for a reverse light or electric brake lockout solenoid.
Step-by-Step Instructions: Wiring Boat Trailer Lights
Step 1: Disconnect the Trailer from the Vehicle
Always begin by separating the trailer plug from the tow vehicle. Turn off all vehicle power to avoid any shorts during installation.
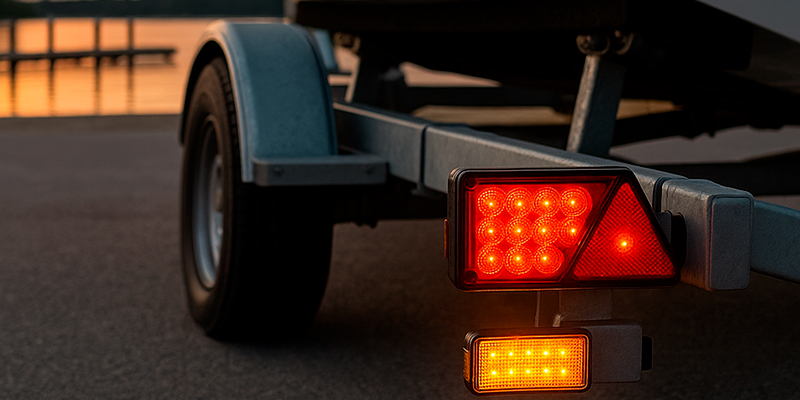
Step 2: Mount the Tail Lights
Attach the left and right tail lights securely to the rear of the trailer frame. Use stainless steel mounting hardware and seal the mounting area with silicone if needed. Ensure the left light (driver side) has a built-in license plate light if required.
Step 3: Route the Wiring Harness
Run the trailer wiring harness along the trailer frame. Start at the tongue near the trailer coupler and work back toward the lights. Use zip ties, grommets, or cable clamps to secure the wiring neatly along the frame, avoiding sharp edges or moving suspension parts.
Use marine-grade trailer wiring with tinned copper conductors, which resist corrosion and moisture better than standard wire.
Step 4: Connect the Ground Wire
The white ground wire from the wiring harness must be securely attached to a clean, bare metal part of the trailer frame using a stainless steel self-tapping screw. A poor ground connection is one of the most common causes of trailer lighting issues.
Step 5: Connect the Tail and Brake/Turn Signal Wires
Use heat-shrink butt connectors or waterproof connectors to splice the harness wires to the tail light wires:
- Brown wire connects to both tail lights (run a jumper wire to the other side).
- Yellow wire connects to the left side brake/turn signal.
- Green wire connects to the right side brake/turn signal.
Apply dielectric grease inside each connector to reduce corrosion.
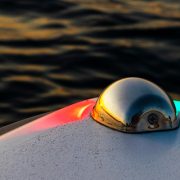
Step 6: Add Side Marker Lights (If Applicable)
Some trailers require amber and red side marker lights depending on their length and configuration. These are usually connected to the brown tail light wire and grounded directly to the trailer frame near the mounting point.
Step 7: Test Your Trailer Lights
Reconnect the trailer plug to your tow vehicle and test the following:
- Running lights (with vehicle headlights on)
- Left and right turn signals
- Brake lights
- Reverse lights (if using a 5-pin connector)
Use a trailer light tester or have someone help confirm functionality. If something doesn’t work, double-check the ground connection and all wire splices.
Step 8: Seal and Protect the Wiring
Wrap exposed connections with marine electrical tape, and use additional cable clamps to secure loose wires. Make sure all connectors are positioned away from areas likely to be submerged or exposed to road spray.
Why Marine-Grade Wiring Matters for Boat Trailers
Boat trailers are exposed to saltwater, humidity, and vibration — all of which can damage electrical systems over time. Marine trailer lights and marine-grade wiring offer enhanced corrosion resistance, UV protection, and sealing for long-lasting reliability. Avoid standard automotive wires, as they often corrode quickly when exposed to moisture or road salt.
Final Tips for Boat Trailer Light Installation
- Check local laws regarding required trailer light configurations.
- Install a battery-powered trailer light tester for quick pre-launch checks.
- Upgrade to submersible LED trailer lights for longer lifespan and better visibility.
- Consider using a junction box near the tongue for easier troubleshooting and rewiring in the future.
Conclusion
Wiring boat trailer lights doesn’t need to be intimidating. With the right tools, connectors, and marine-grade materials, you can wire your boat trailer safely and efficiently. Proper trailer light wiring ensures compliance with road laws and, more importantly, keeps you and other drivers safe while transporting your boat to the water. Whether you’re outfitting a new trailer or replacing old wiring, take your time, double-check connections, and protect every splice from moisture and wear.