Kicker marine speakers are a great choice for anyone looking to enhance the audio experience on their boat. Designed to withstand the harsh marine environment, these speakers offer high-quality sound while being durable enough to resist water, salt, and UV exposure. In this guide, we will walk you through the step-by-step process of installing Kicker marine speakers on your boat.
In addition to their sound quality, Kicker marine audio systems offer LED lighting options like the Kicker LED speakers, including the popular Kicker 6.5 coaxial marine pair. You can easily add a cool blue LED light effect with a controller to personalize the experience and set the mood. With features like Bluetooth, remote volume control, and RGB controllers, these systems let you upgrade and enjoy a customizable marine audio setup that’s both loud and visually appealing. Whether you’re tuning your favorite songs or adding an amp for more watt power, Kicker marine stereo systems are a top recommendation for any boat.
Tools and Materials You’ll Need
- Kicker marine speakers
- Marine-grade speaker wire
- Wire strippers
- Drill and drill bits
- Jigsaw (optional for cutting speaker holes)
- Screwdriver (Phillips and flathead)
- Marine sealant
- Crimp connectors and crimping tool
- Electrical tape
- Marine amplifier (optional for enhanced sound)
- Multimeter (for checking electrical connections)
Ensure that all your tools and materials are marine-rated, as this will protect them from corrosion and wear due to exposure to water and the elements.
When installing your Kicker marine speakers, it’s important to follow the description and use the proper kit for wiring, including LED wires if you have lighting features. You can plug the system into a marine-rated amplifier for more channels and better sound, with an optional lighting controller to add color and fade effects. Many recommend fusion systems or wet sounds for an enhanced audio experience.
Step 1: Plan the Installation
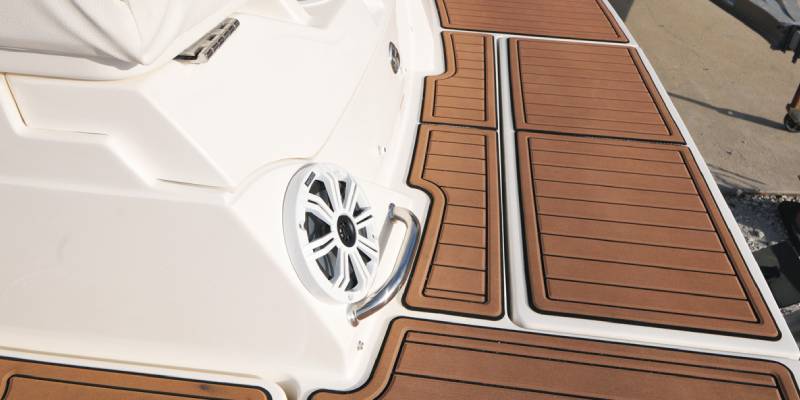
Before starting, it’s important to plan the layout and positioning of your speakers. Kicker marine speakers are usually mounted in the boat’s cockpit, deck, or cabin area, where the sound will be evenly distributed.
- Measure the Space: Check the speaker dimensions to make sure they fit in the chosen location. Consider factors like mounting depth and clearance behind the panel.
- Check Wiring Path: Plan how you will route the speaker wire from the speakers to your stereo head unit or amplifier. Make sure the path avoids sharp edges and excessive bending to prevent damage to the wires.
- Speaker Placement: Place the speakers where they will be unobstructed and provide the best sound. Avoid placing them near areas where they may be exposed to water spray unless they are specifically designed for such placement.
Step 2: Prepare the Mounting Holes
If your boat already has pre-cut holes for speakers, you can skip this step. If not, you will need to cut holes in your desired location for the speakers.
- Mark the Speaker Location: Use the speaker template (often provided with the speakers) to mark the position where you want to install the speakers.
- Drill a Pilot Hole: Once the position is marked, use a drill with an appropriately sized bit to drill a pilot hole inside the circle. This will serve as the starting point for cutting the hole.
- Cut the Speaker Hole: Using a jigsaw, carefully cut along the marked circle. Be sure to wear safety glasses and work slowly to avoid damaging the boat’s surface.
Step 3: Run the Wiring
Now that the holes are prepared, it’s time to run the marine-grade speaker wire from the stereo head unit or amplifier to the speaker locations.
- Route the Wires: Feed the wires through the boat’s interior, following the path you planned earlier. Use zip ties to secure the wires and prevent them from tangling or moving around.
- Strip the Wire Ends: Once the wire is in place, use wire strippers to remove about 1/4 inch of insulation from the ends of the wires.
- Connect the Wires: Attach the positive and negative wires to the corresponding terminals on the speakers. Ensure a secure connection using crimp connectors, then cover the connections with electrical tape or heat-shrink tubing to protect them from moisture.
Step 4: Install the Speakers
With the wiring complete, you can now install the speakers into the pre-cut holes.
- Apply Marine Sealant: Before mounting the speakers, apply a thin bead of marine sealant around the edge of the mounting hole. This will help to seal the speakers and prevent water from entering the boat’s interior.
How to Install Kicker Marine Speakers: Conclusion
After following these steps, your Kicker marine speakers should be securely installed and ready to provide high-quality sound on your boat. Be sure to test the system thoroughly by playing music and adjusting the settings to achieve the best audio experience. Regular maintenance, such as checking connections and sealing integrity, will ensure that your speakers remain in top condition despite exposure to harsh marine elements. With the right setup and care, your Kicker marine speakers will enhance your boating experience for years to come.

