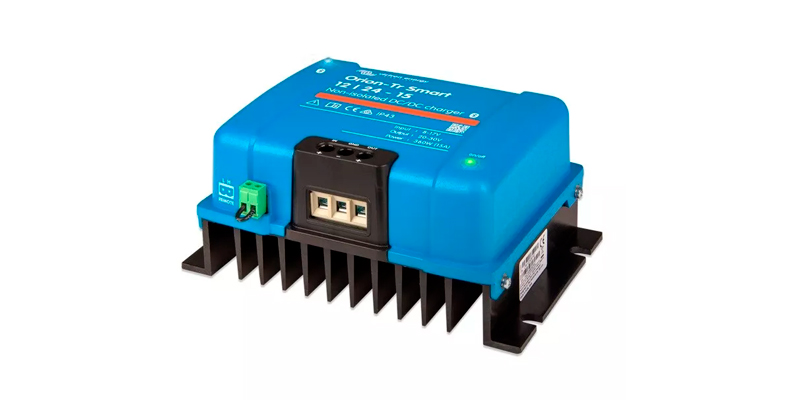
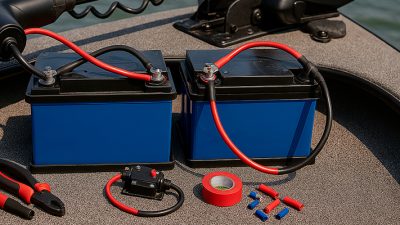
Installing a Victron DC to DC charger is a great way to ensure efficient and reliable power management on your boat, yacht, or RV. This charger allows you to charge your auxiliary battery bank from the alternator while protecting both your starter and house batteries. Below is a detailed guide on how to install a Victron DC to DC charger correctly.
Tools and Equipment Needed
Before you begin, gather the following tools and equipment:
- Victron DC to DC charger
- Cables (gauge depends on the system amperage)
- Battery isolator or fuse block
- Heat shrink tubing or cable ties
- Ring terminals
- Crimping tool and wire stripper
- Electrical tape
- Multimeter (optional for testing)
Step 1: Plan the Installation
Identify where you want to mount the Victron dc-dc charger. Ideally, it should be placed in a dry, well-ventilated area, near your auxiliary battery but away from direct heat sources. Ensure the location allows for easy access to wiring points and sufficient airflow around the charger.
To ensure a safe and efficient Victron DC-DC charger installation, the Victron Orion-Tr Smart DC-DC charger should ideally be mounted close to the auxiliary battery but not directly above it to prevent damage due to battery gassing. This setup enables proper alternator charging, as the Orion-Tr smart charger will return to charging mode once conditions are met to enable charging. The DC-DC battery charger should be wired with adequately rated cables, such as 16mm², and stranded wires with flexible cores can be used according to specifications to ensure low contact resistance. Additionally, for installations requiring external control, such as a remote option for engine shutdown detection, the configuration must be carefully set in combination with an ignition switch or other control input to override the remote sequence as needed (see examples and figure 5 in the manual).
For secure connections, use ferrules on any stranded cables to comply with UL486 requirements. Make sure that all input and output screw terminals are tightly clamped to prevent loose contacts, and if an L-pin is used, ensure it is firmly inserted to prevent disconnection. Pay particular attention to any non-isolated battery sense connections, as they allow the Victron battery charger to adjust based on the chassis battery condition.
Step 2: Turn Off All Power Sources
Before you start any wiring work, turn off the boat’s or vehicle’s electrical systems. Disconnect the negative terminal of the starter battery and auxiliary battery to prevent any accidental shorts or sparks during the installation.
Step 3: Run Cables from the Alternator and Starter Battery
Run the cables from your alternator and starter battery to the input terminals of the Victron DC to DC charger. Use the appropriate cable size based on the charger’s output rating (consult the charger manual for recommended wire sizes).
Ensure that you protect these cables with an appropriate fuse or circuit breaker as close as possible to the positive terminal of the starter battery to protect against short circuits.
Step 4: Connect the Charger to the Auxiliary Battery
Next, connect the output side of the Victron DC to DC charger to the auxiliary (house) battery. Again, use the correct gauge wire based on the charger’s output rating, and fuse the positive side of the cable as close to the auxiliary battery as possible.
Make sure the connections are tight and secure to avoid voltage drops or connection issues.
Step 5: Ground the Charger
The Victron DC to DC charger needs a proper ground connection. You can connect the ground terminal to the negative terminal of the auxiliary battery or a clean metal part of the boat or vehicle chassis, depending on the system configuration.
Step 6: Connect the Remote or Ignition Wire (Optional)
Some models of the Victron DC to DC charger feature an ignition or remote control wire. This wire can be connected to the vehicle’s ignition system to enable the charger to start charging only when the engine is running. Alternatively, you can use a manual switch if desired. This step is optional but recommended for optimal power management.
Step 7: Install Temperature and Voltage Sensors (If Applicable)
If your charger comes with optional temperature or voltage sensors, install them according to the manufacturer’s guidelines. These sensors provide additional protection and efficiency by monitoring the battery’s condition and adjusting the charge accordingly.
To further enhance the performance of your battery charger, consider adding optional temperature and voltage sensors if available. These sensors optimize the charging process by continuously monitoring battery conditions, adjusting output to maintain safe and efficient charging levels. Proper installation of these sensors according to the manufacturer’s guidelines ensures that the charger responds accurately to fluctuations, prolonging battery life and enhancing overall system reliability.
Step 8: Check All Connections and Power On
Once all connections are secure, double-check your wiring, ensuring that the positive and negative terminals are correctly connected, and the fuses are installed properly. Reconnect the negative battery terminals for both the starter and auxiliary batteries.
Power on your boat or vehicle and observe the Victron DC to DC charger. The LEDs or display on the charger should indicate proper operation, and the auxiliary battery should start charging.
Step 9: Test the System
Use a multimeter to confirm that the correct voltage is being supplied to the auxiliary battery when the engine is running. You should see the voltage rise as the charger works to top up the auxiliary battery.
How to Install Victron DC to DC Charger: Conclusion
Installing a Victron DC to DC charger is a straightforward process if you follow the steps carefully. It’s essential to use the correct cable sizes, fuses, and connections to ensure your system runs safely and efficiently. With your charger installed, you can now enjoy efficient power management for your boat or RV’s auxiliary battery system. Always refer to the Victron installation manual for any specific details or recommendations.
When installing the Victron Orion Tr Smart DC-DC Charger 30A, it’s crucial to ensure proper ventilation and mount it close to, but never directly above, the battery to prevent damage from battery gassing. The Orion-Tr charger includes features like engine shutdown detection, which halts charging when the engine is off; however, this function can be configured in combination with an ignition switch or remote connection to allow charging control based on external inputs. For secure connections, use ferrules on stranded wires to ensure low contact resistance, as required by UL486, and use adequately rated cables, such as 16mm² or 40A, to meet the charger’s specifications. The VictronConnect app provides options to configure settings like engine shutdown detection override, charger mode, and lithium battery compatibility, ensuring the charger only activates under appropriate conditions. Always refer to wiring diagrams, such as figure 5, for correct connections, and allow at least 5 seconds after shutdown to restart, maximizing the device’s operational safety and performance.


