Setting up the Victron MultiPlus inverter/charger correctly is essential for efficient onboard power management.
Whether you’re outfitting a sailboat, motor yacht, or liveaboard vessel, proper configuration ensures the system runs safely,
charges batteries effectively, and integrates with your DC and AC systems seamlessly.
What You Need Before Configuration
- Victron MultiPlus unit (12V, 24V, or 48V)
- VE.Bus to USB interface or MK3-USB cable
- VictronConnect software or VEConfigure tool installed on a laptop
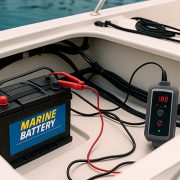
- Battery bank connected and safely fused
- Shore power or generator input available
Step 1: Connect to the MultiPlus
Use the VE.Bus interface cable to connect your laptop to the MultiPlus. Open the VictronConnect app or VEConfigure.
If using VEConfigure, ensure you have downloaded the correct firmware and driver updates from Victron’s website.
Step 2: Identify System Requirements
Determine how you’ll be using the MultiPlus:
- Will it operate as a shore power charger only?
- Do you need inverter priority for silent night operations?
- Are you integrating solar via a Victron MPPT controller?
This will guide the appropriate input limits, inverter modes, and charger parameters.
Step 3: Configure Charger Settings
Navigate to the Charger tab:
- Select the battery type: AGM, GEL, Flooded, or Lithium
- Adjust absorption voltage and float voltage according to battery specs
- Set maximum charge current (often 50–100% of battery capacity)
- Enable temperature compensation if using a battery temp sensor
Step 4: Configure Inverter Settings
In the Inverter tab, set:
- Input frequency range: choose narrow or wide based on your generator/shore power
- Low battery cut-off and restart voltage
- Inverter frequency (typically 50Hz or 60Hz depending on region)
Step 5: Grid and Generator Input Limits
To avoid tripping breakers or overloading limited shore power,
set the input current limit on the General tab. For example:
- Marina shore power: 16A or 30A
- Portable generator: 10A or less depending on size
Step 6: Enable PowerAssist (Optional)
Victron’s PowerAssist technology can supplement shore power with battery energy.
This is useful when appliances draw more current than shore power alone can provide.
Enable and set the maximum support level carefully to avoid draining the batteries unexpectedly.
Step 7: Save and Write Configuration
Once all parameters are set, click “Send settings to device” or “Write to unit.”
Reboot the MultiPlus to finalize configuration. Monitor behavior through VictronConnect or a connected GX device like Cerbo GX.
Advanced Integration Tips
- Use Victron Cerbo GX or Color Control GX for monitoring and advanced control
- Connect to VRM Portal for remote access
- Sync with Smart Battery Sense and MPPT controllers via VE.Direct
- Label all AC and DC wiring clearly for troubleshooting
Final Checks
Test the system under load with shore power and without it. Observe battery voltage,
charging current, and AC load transitions. Make sure the inverter kicks in when shore power disconnects,
and that battery charging resumes automatically.
Conclusion
Configuring the Victron MultiPlus properly provides reliable energy management aboard any marine vessel.
Follow your battery manufacturer’s specs, use Victron’s official tools, and test thoroughly before setting sail.
Once configured, the MultiPlus offers powerful automation and flexibility for life at sea.