Adding a swim platform to your boat is a great way to enhance its functionality and provide an easier way to enjoy water activities. With the right tools and materials, you can install a swim platform that will make your boat outings more enjoyable. Here’s a step-by-step guide on how to add a swim platform to your boat.
1. Gather the Necessary Tools and Materials
- Swim platform kit (pre-fabricated or custom-built)
- Drill with drill bits
- Measuring tape
- Stainless steel bolts and screws
- Marine-grade adhesive or sealant
- Wrench set
- Level
- Protective gloves and safety goggles
2. Select the Right Swim Platform
There are various types of swim platforms available, from fiberglass to teak wood or aluminum. When choosing one, consider factors such as your boat’s size, the platform’s weight capacity, and the intended use. Pre-fabricated kits make installation easier, but custom-built platforms can be made to fit your boat’s exact specifications.
3. Measure and Mark the Mounting Area
Use measuring tape to determine where you’ll mount the platform on the transom (back) of the boat. Ensure the platform will be level with the water when the boat is idle. Mark the drill points on the transom carefully for an accurate installation.
4. Drill Pilot Holes
Using the drill, create pilot holes at the marked points on the transom. These pilot holes will guide the mounting screws or bolts and help prevent the fiberglass or metal from cracking during installation.
Tip: Use stainless steel hardware for durability and to prevent rusting in marine environments.
5. Attach the Swim Platform
Position the platform and align it with the drilled pilot holes. Secure the platform using stainless steel bolts or screws, ensuring they’re tight and properly fitted. Apply marine-grade adhesive or sealant around the bolts to prevent water leakage and provide extra security.
6. Add Additional Supports if Necessary
If the platform is large or expected to carry heavy loads, consider adding support brackets under the platform. Attach these brackets to the transom and secure them with bolts to provide extra stability.
7. Inspect and Test the Platform
Once installed, check that the platform is stable and properly secured. Gently apply pressure to confirm that it doesn’t move or flex excessively. After installation, test the platform on the water to ensure it can support weight and functions as expected.
8. Perform Regular Maintenance
Inspect the swim platform periodically for signs of wear or damage. Tighten bolts as needed, and check for any rust or corrosion on metal parts. This maintenance will help keep your platform in good condition over time.
Adding a Ladder for Easy Access
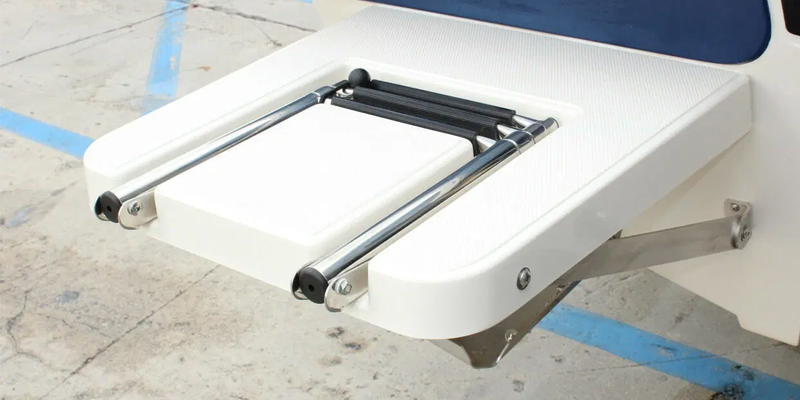
Incorporating a boarding ladder alongside your swim platform greatly enhances accessibility, particularly for swimmers re-entering the boat. Ensure the ladder is securely attached, using stainless-steel hardware to prevent corrosion. Options like a telescoping ladder or a two-step swim ladder are excellent for compact boats, while platform and ladder combinations are ideal for larger models. Install the ladder at an angle to ensure comfort and usability.
Securing the Platform with Backing Plates
For additional stability, reinforce your mounting points with backing plates made of stainless steel or marine-grade plywood. These plates distribute weight and minimize stress on the hull, especially on older boats. Whether mounted on the starboard side or port side, this step ensures the platform can handle heavy loads without compromising the integrity of the transom.
Considerations for Outboard Boats
When installing a swim platform on outboard-powered boats, ensure there’s enough clearance from the outboard motor and its movement. Position the platform so it doesn’t obstruct the outdrive or other components. Using angle brackets and rubber molding can help create a snug fit around curves in the transom or hull.
Placement and Safety Features
Determine which side of the transom—starboard or port—is best suited for your platform and ladder installation. Factors such as ease of access and proximity to grab rails or handrails should be considered. For safety, ensure the platform level aligns with the waterline when the boat is in the water, allowing swimmers to board comfortably without slipping.
Final Adjustments and Maintenance
After installation, inspect the mounting holes for tightness and seal any gaps with marine-grade sealant to protect the gelcoat and prevent water intrusion. Regularly check the stainless-steel hardware for corrosion and ensure the ladder operates smoothly. This maintenance will keep your swim platform functional and safe for years to come.
How to Add a Swim Platform to a Boat: Conclusion
Adding a swim platform to your boat can improve its usability and provide a convenient way to access the water. By following these steps, you’ll ensure a secure installation that enhances your boating experience. Enjoy your new swim platform and the added convenience it brings to your water adventures!

